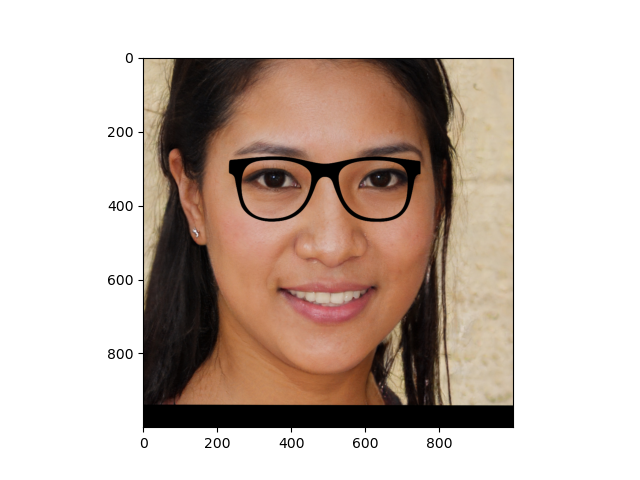
As a part of the course from OpenCV, this is the explanation of the Virtual Makeup - EyeGlasses project.
The goal is to overimpose an image (with transparency) of the glasses to an image of face.
The steps performed by the program are:
- Load the images (glasses and face) and detect the landmarks
- Normalize the image and get the eye points
- Get the left and right eye points from the landmarks
- Resize the glasses image
- Overimpose the glasses image to the face image
Load the images and detect the landmarks
This is the easy part, because all the heavy lifting is performed by the dlib and its face landmarks detector.
It is a neural network that detect 68 key points (landmarks) on a face image.
The preamble of the file contains all the necessary imports
1import cv2
2import dlib
3import matplotlib.pyplot as plt
4import numpy as np
5
6import faceBlendCommon as fbc
followed, in the main function by the code to import the image and get the landmarks
 1# Load the image
 2# Landmark model location
 3PREDICTOR_PATH = "shape_predictor_68_face_landmarks.dat"
 4
 5# Get the face detector
 6faceDetector = dlib.get_frontal_face_detector()
 7# The landmark detector is implemented in the shape_predictor class
 8landmarkDetector = dlib.shape_predictor(PREDICTOR_PATH)
 9
10im = cv2.imread("face1.jpg")
11imDlib = cv2.cvtColor(im, cv2.COLOR_BGR2RGB)
12
13### Detect the landmarks
14
15landmarks = fbc.getLandmarks(faceDetector, landmarkDetector, imDlib, 1)
16print(f"{len(landmarks)} landmarks detected")
17
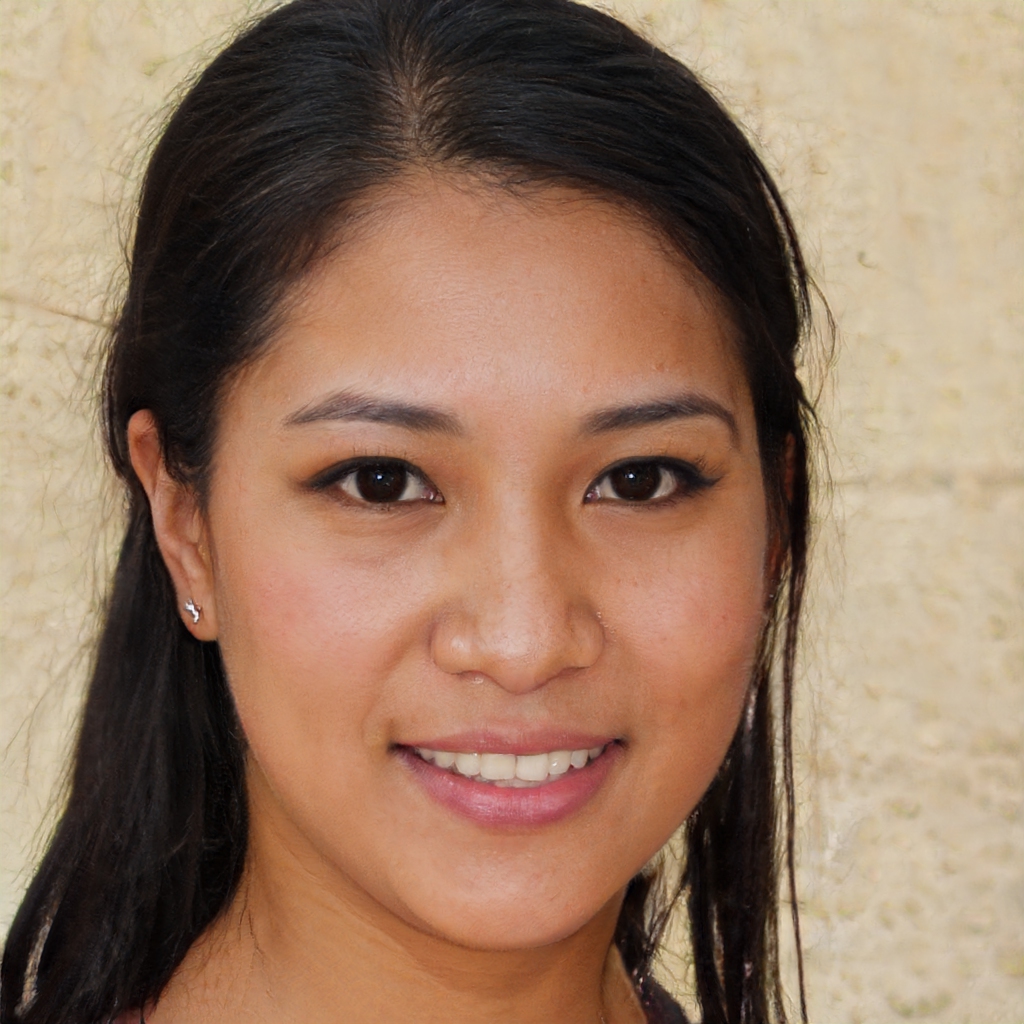
The face image is:
Normalize the image, get the face border points
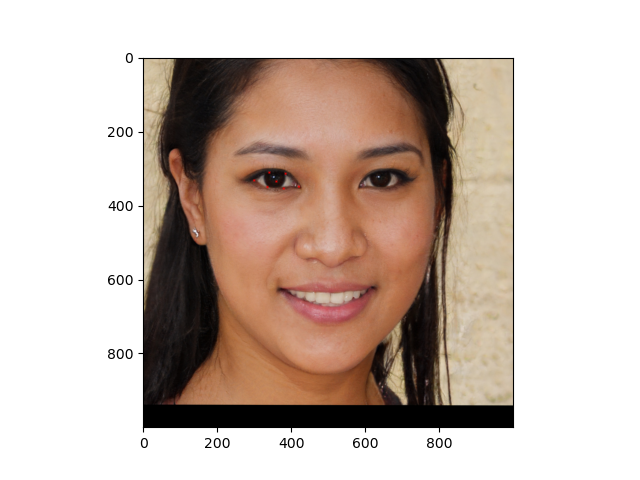
The image and the detected points are normalized to have the eye aligned and a standard resolution (e.g 1000x1000)
1imOut, pointsOut = fbc.normalizeImagesAndLandmarks((1000, 1000), imDlib, np.array(landmarks))
2
3glasses = GlassesImage("glasses2.png")
4faceBorderPoints = [pointsOut[0], pointsOut[16]]
5
According to the following image face border points faceBorderPoints next to the eyes 1 and 47.
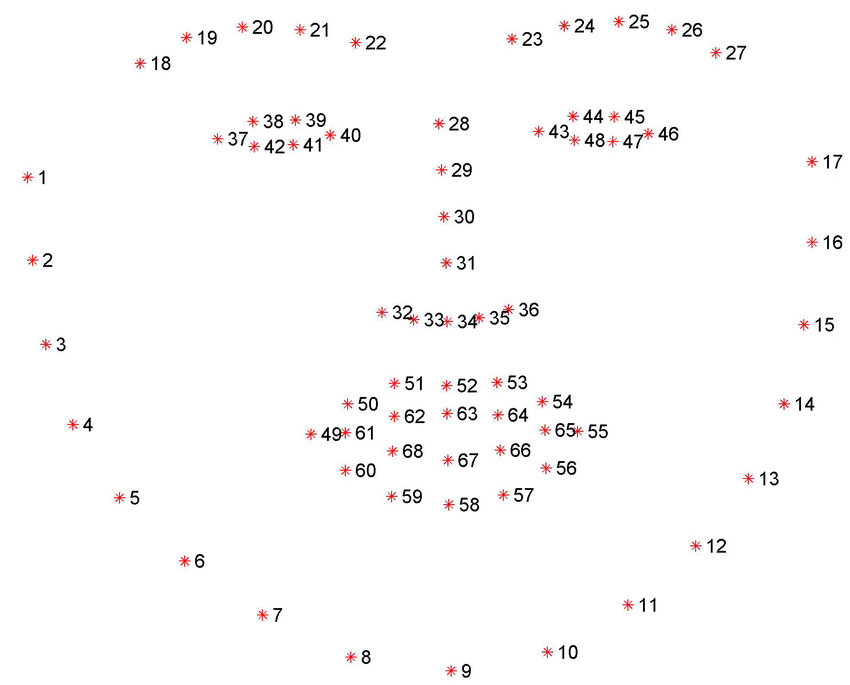
To check if the points are correctly indentified, a debug function drawLandmarks is used when debugging (and commented in the final code) to draw also the points.
1### function drawLandmarks outside the main code
2def drawLandmarks(image, landmarks):
3    for landmark in landmarks:
4        cv2.drawMarker(image, landmark, (255, 0, 0), cv2.MARKER_STAR, 7)
5    plt.imshow(image)
6    plt.show()
For example, the following image is the output of
where leftEyePoints and [centerLeftEye] are the array of the left eye points coordinates (37-42) and the center left eye is the mean of these points
Resize the glasses image
The glasses image is resized to match the border of the face next to the eyes. The glasses variables has already been initialized with a new instance of GlassesImage.
1 resizedGlasses = glasses.resizeFromBorder(centerLeftEye, centerRightEye)
GlassesImage is a convenience class that reads an image representing the eyeglasses and has a method to resize this image according to the face border points.
 1class GlassesImage:
 2    def __init__(self, imagePath):
 3        self.image = cv2.imread(imagePath, cv2.IMREAD_UNCHANGED)
 4        self.height, self.width = self.image.shape[:2]
 5        if self.image is None:
 6            raise Exception(f"Invalid image path {imagePath}")
 7
 8    def leftEyeCenter(self) -> (float, float):
 9        return self.width / 4.0, self.height / 2.0
10
11    def rightEyeCenter(self) -> (float, float):
12        return self.width / 4.0 * 3.0, self.height / 2.0
13
14    # Used only for debug
15    def showCenters(self):
16        imageCopy = np.copy(self.image)
17
18        leftPos = self.leftEyeCenter()
19        rightPos = self.rightEyeCenter()
20
21        cv2.drawMarker(imageCopy, [leftPos, rightPos], (0, 0, 255), cv2.MARKER_STAR)
22
23    def resizeFromBorder(self, faceEarPoints):
24    glassesImgWidth = np.linalg.norm(faceEarPoints[0] - faceEarPoints[1])
25    glassesOrigWidth = self.image.shape[1]
26    ratio = float(glassesImgWidth / glassesOrigWidth)
27    resized = cv2.resize(self.image,
28                         None,
29                         fx=ratio, fy=ratio,
30                         interpolation=cv2.INTER_LANCZOS4)
31    return resized
Overimpose the glasses image to the face image
Finally the resized glasses images and face are blended through the alphaBlend function.
It takes a background image (the whole face), an image with alpha channel (the glasses) and a (x,y) position used to put the glasses image in the right place. The x and y coordinates are taken from the bounding box of the left eye landmarks
 1def alphaBlend(background: np.ndarray,
 2               glasses: np.ndarray,
 3               x: float,
 4               y: float):
 5    result = background.copy()
 6    gl_b, gl_g, gl_r, gl_a = cv2.split(glasses)
 7    gl_a.astype(float)
 8    gl_a = gl_a / 255.0
 9    glasses_rgb = cv2.merge([gl_b * gl_a, gl_g * gl_a, gl_r * gl_a])
10
11    height, width = glasses.shape[0], glasses.shape[1]
12    top = y
13    left = x - 60
14    backgroundTmp = result[top:top + height, left:left + width, :]
15
16    # do the same for the background, the face, but using 1 - alpha
17    # as blending factor
18    bg_b, bg_g, bg_r = cv2.split(backgroundTmp)
19    backgroundTmp = cv2.merge([bg_b * (1 - gl_a), bg_g * (1 - gl_a), bg_r * (1 - gl_a)])
20
21    # then add again the images
22    cv2.add(glasses_rgb, backgroundTmp, backgroundTmp)
23    result[top:top + height, left:left + width, :] = backgroundTmp
24    return result
First the glasses image is split in their parts : R,G,B and Alpha channels and the alpha channel is normalized to the range [0,1]
The backgroundTmp is the temporary image used for the alpha blending of the portion of the glass image, which has bounding box in the form (x,y,width, height) as (left, top, left + width, top + height). To blend the image the formula used is
$$Result = glasses \cdot \alpha + face \cdot (1 - \alpha)$$
The + operation is represented by cv2.add() and the final line before the return simply replaces the temporary image in the final one.
In the end the results is shown with
1
2result = alphaBlend(imOut, resizedGlasses, leftEyePointsBbox[0], leftEyePointsBbox[1])
3plt.imshow(result)
4plt.show()